

Well, the Panthers didn’t have a good week. No points on the board in either the JV or Varsity games. The coaches seemed a bit discouraged, so I thought I’d make a Panther Spirit Cake for Sam to take to school on Monday. Their colors happen to be black and red, so its alter-ego is Checkerboard Cake. I love this idea because it can truly be used for any combination of colors. The possibilities are endless! Think Superbowl Sunday with a team’s colors, Halloween with black and orange, or even rainbow (which would require a TON of layers, but could be really fun). I think the next time I try this will be for Christmas with red and green.
I first got the idea for this recipe from Darla at Bakingdom. She made a Hogwarts Vertical Layer Spice Cake for her release party for Deathly Hallows Part 2. Well, her cake turned out amazing and was a wonderful tribute to the greatness of Harry Potter. When I saw her cake, I was intrigued about how it would look with just two colors. Since then, I’ve been dying to try!

I ran into some issues with this recipe, but thankfully I’ve worked out all the kinks for you. I wanted a red and black cake. The red part was a no-brainer: red velvet cake. I had a nice standby recipe I found in a cookbook a few years ago. For the black part, I immediately thought of the base cake for Revell’s Food Cake because it was dark and delicious. Unfortunately, Revell’s Food Cake is very moist and fluffy… and completely wrong for this recipe! You really need a cake that will be nice and thick and have a good supportive crust on the outside. The red velvet recipe I used was perfect! Next time, I’ll probably use that recipe for both parts to ensure that the cake has the same consistency throughout. Food coloring and food gel can help you make any color you can think of.
Also, I love making cake from scratch, but if it’s not your thing, no worries! This recipe will work just fine with a box mix. Just add your food coloring and go for it! Don’t be afraid to be creative and adventurous.
I used a delicious cream cheese frosting adapted from Kate at Our Best Bites. I added extra sugar to mine because hers was a bit too cheesy for what I had in mind. To me, nothing goes better with red velvet cake than cream cheese frosting!
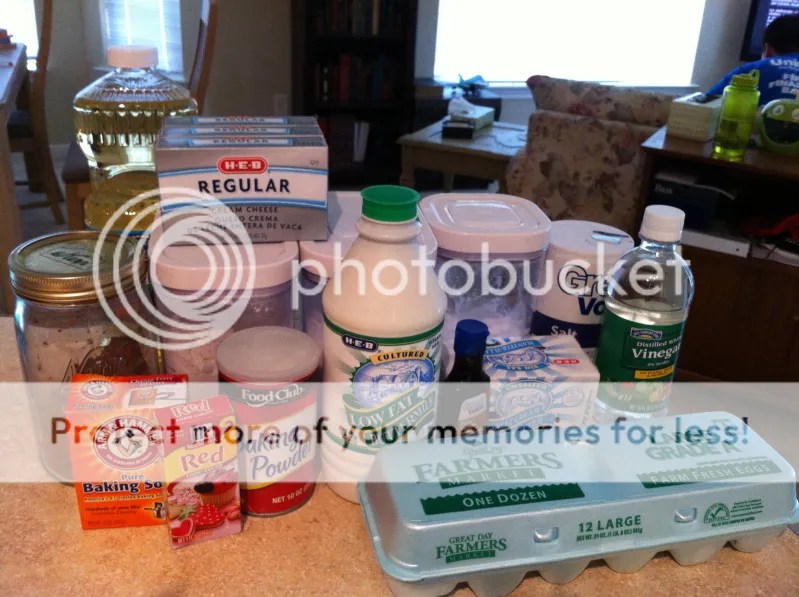
Alright, here we go. I lined up all my ingredients and got to work.
I know that looks like a lot, but that’s because it is! You’re essentially baking two cakes at once, which will result in a four-layer cake. That’s a pretty huge cake, but I’m confident a handful of football coaches can finish it off. If you don’t want such a huge cake, consider using smaller cake pans or thinner layers.
Here’s the recipe I used for red velvet cake. If you want a different color, substitute the red food coloring for something else.
Red Velvet Cake
2 1/2 cups flour
2 tablespoons unsweetened cocoa powder
1 teaspoon salt
1 1/2 cups sugar
1 1/2 cups vegetable oil
2 large eggs
1/2 teaspoon red gel-paste food color (2 tablespoons regular food color)
1 teaspoon pure vanilla extract
1 cup buttermilk
1 1/2 teaspoons baking soda
2 teaspoons distilled white vinegar
Directions:
Preheat oven to 350 degrees. Spray cake pans with non-stick spray.
In a large bowl, whisk together cake flour, cocoa, and salt; set aside.
In the bowl of a stand mixer fitted with the paddle attachment, beat sugar and oil on medium high speed until combined. Add eggs, one at a time, beating until each is incorporated, scraping down sides of bowl as needed. Mix in food color and vanilla.

Reduce speed to low. Add flour mixture in three batches, alternating with two additions of buttermilk and beating until combined after each.
In a small bowl, stir together the baking soda and vinegar (it will foam); add mixture to the batter, and mix on medium speed until combined, about 10 seconds.

Bake for 30 minutes, or until a fork inserted in the middle comes out clean. Transfer to wire racks to cool completely.

I made Revell’s Food Cake for the other two layers. You can visit the original recipe to see how to make it if you’re interested. It’s very delicious, but won’t work well with this particular recipe.
For the next step, I could’ve done some math involving finding the circumference and radius of the cake and measuring evenly spaced cuts, but really… If there’s a way to avoid math, I avoid math. Here’s the English Major way, but if you’re a math person, by all means break out that protractor.
You’ll need to cut each layer into three pieces. I used a funnel and a pot lid to get perfect circles.

Try to make the cuts evenly spaced apart. Don’t forget to trim the dome off your cakes so they’ll stack flat.

When you’re cutting your layers, it helps to use a butter knife and make sure your cuts go all the way through so the layers don’t stick together. When you’re done cutting, separate the layers onto pieces of parchment paper.

Once you’re done cutting all your layers, clean out your mixer bowl and go make the frosting. My cake ended up requiring a double batch of this recipe.
Cream Cheese Frosting
3-8 oz. packages of cream cheese, room temperature
3/4 cup of unsalted butter, room temperature
3 cups of powdered sugar
1 1/2 teaspoons of vanilla extract
1. Whip together the cream cheese, vanilla, and butter in a mixer until smooth.
2. Add the powdered sugar one cup at a time until light and fluffy.

Now it’s time to start assembling your cake! You’re going to alternate colors. Since you used the same objects to trace everything, it should fit together like a puzzle.

You can see where I had some trouble with my black cake. Here’s what the next layer should look like:

Now, put a crumb coat on to ensure you’ll get a nice clean look when you’re finished.

The top layer had the black cake on the outside, and it crumbled into a mess. I left that part off, so that’s why my cake has a weird dome effect to it. Once your crumb coat is done, pop it in the fridge for at least 30 minutes.

Then use a flat spatula to finish frosting, and you’re done!

The best part is cutting it open to see the inside!

Don’t be discouraged by the semi-ugliness of my cake… If you use the right recipe, yours will be gorgeous!

And, of course, no slice of cake would be complete without a nice drink of milk from a panda mug! Life is good.


Pingback: Little Panda Cupcakes « Panda Poses
Pingback: Libraries, Cheesecake, and Chandler Bing « Panda Poses